Sunday, December 25, 2011

More work on paper

Another work on paper finished.  Again a depiction of a type of marine protozoa.  Terry thinks it looks like a thistle.  It kind of does.  It was very difficult to get the complex image to stand out against the complex background.  I'm still not sure that the intricacies of the design are obvious to someone who has not seen the graphite drawing of the design.  Let me know what you think.  Does it work?


The red and green vertical stripes lend a kind of Christmassy feel to this piece.  Happy Christmas everyone!

Pin It

Friday, December 23, 2011

More work in progress

So I'm about 18 hours into this latest piece and I thought I would show you where I'm at.  First I stitched in the 'bare bones", that is, the lines in stem stitch.  Then I have used french knots and seed stitches of varying length to fill out the "body" of the nebula.


This shot shows the work on the frame.


Extreme close up shows the french knots with seed stitches in between.


Pin It

Friday, December 9, 2011

Work in progress

I thought you might like to see something of the process that I go through to create one of my artworks.


I start with undyed silk fabric and threads.  In this case, a fine Chinese dupioni silk fabric with mulberry silk 60/2's thread and a flat dupioni thread.  The dupioni thread has a very high lustre and although slightly slubby is still beautiful to stitch with.


This close up image gives you a good idea of the nature of the materials.  The dupioni thread is about twice the thickness of the mulberry silk 2 ply.


Fabric dyed and waiting to go into the microwave.  I use Landscapes dyes, both for their ease of use and the fabulous colours you obtain on silk.  These dyes will also dye wool and nylon, ie protein fibres.


Threads dyed, microwaved and ready to rinse.


Fabric after dyeing and drying.  The dark areas were not as "dark" as they needed to be (even though they look ok in this photo), so I used Shiva oil sticks to adjust the colour balance.


Base fabric after darkening with oil stick with dyed threads on top.

Enhanced by Zemanta
Pin It

Saturday, December 3, 2011

Artists' Retreat at St Helens

I have just returned from a week away at St Helens on Tasmania's north east coast.  Once a year I and my two textile artist friends Carolyn and Jane take a week away so that we can immerse ourselves in all things art and textiles.  We are fortunate to have access to a house at St Helens which is perfect for our activities, including an enclosed patio that makes a wonderful "wet" area.

During my book making workshop the week before I had painted some papers with acrylic paints and so spent my week away working on some embroidered works on paper.


I have been wanting to do some work based on images from Ernst Haeckel's Art Forms in Nature.  Both the works depict the forms of marine protozoa.  It is fitting as much of my work is based on the minute and microscopic, the hidden world without and within.  I thought these would be quick to finish, but they were far more labour intensive than I had anticipated.


I have showed some "work in progress" shots on the second work I created.


Here is the image drawn and traced and clamped to the paper waiting to have holes punched using a book maker's awl.


Light weight fusible interfacing was ironed onto the back of the paper to prevent tearing between the holes which had to be placed quite close together to achieve the curved outlines.  This photo shows the reverse side of the paper with the images punched out in tiny holes.


As you can see it is more difficult to clearly see the punched out image on the front side.


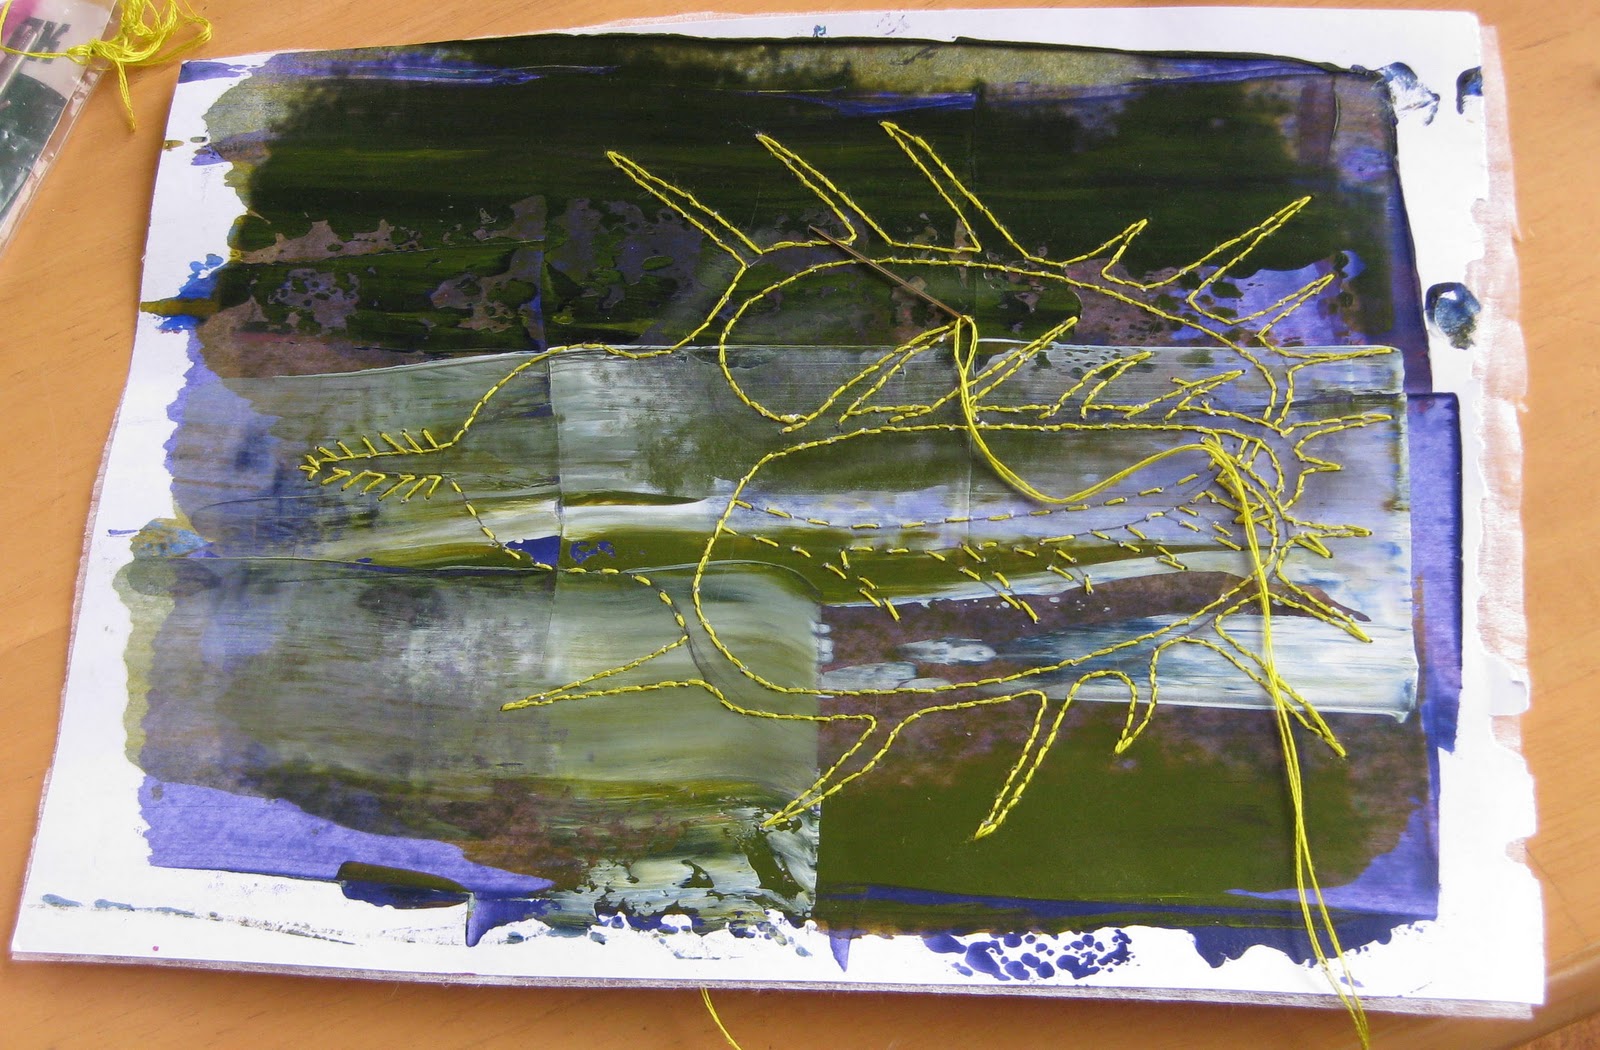
I originally worked the outline in a light blue, only to find, after seven hours of stitching that the completed form was almost impossible to see.


I then went over it in a thicker yellow thread  and that made all the difference.  Fortunately it only took five hours to go over the blue!


The finished work.


I also made some  beaded jewellery while away, but that will be for another blog entry.

Meanwhile, Carolyn and Jane were having an equally productive time.

Jane was experimenting with making lovely gossamer felted scarves.


This scarf was nuno felted onto whisper silk using wool and silk tops.


Tissue silk felted with wool roving.


I loved Jane's felted stole so much I commissioned one for myself.


Fine merino wool felted onto paj silk with silk tops and wool thread added for texture.  This second photo is much closer to the real colour.

Carolyn started off the week with some ecoprinting.


First Carolyn painted the leaves with egg yolk.


The leaves being placed on the T shirt.


After cooking the T shirt in an old iron pot the leaves transferred beautifully with a lovely purple/black border imparted by the iron.


The parts of the T shirt that were on the outside of the bundle received most of the iron colouring.


Equally successful was the printing on a rayon/silk velvet scarf.

After working with the natural dyes Carolyn had a hankering for colour.  

Saris washed and flapping their gorgeous colours on the line.


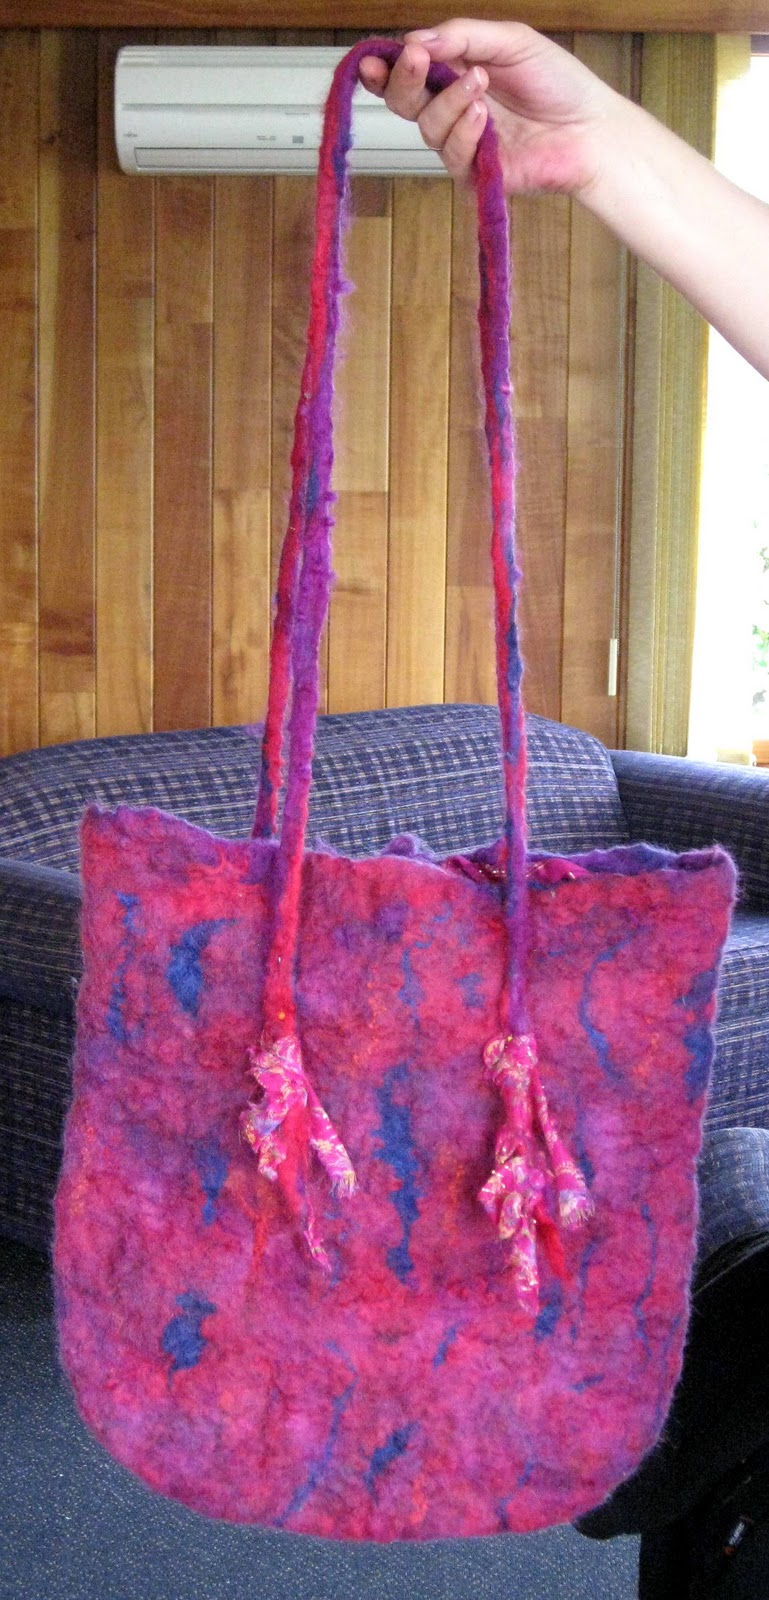
The pink sari was used as a base for her nuno felted bag.


Not quite finished (the handles are pinned on).  Carolyn ran out of fleece after the first side was felted and so had to dye more fleece.  As a result the bag has two different sides.


Close up of the sari fabric felted onto the handle ends for decoration. 

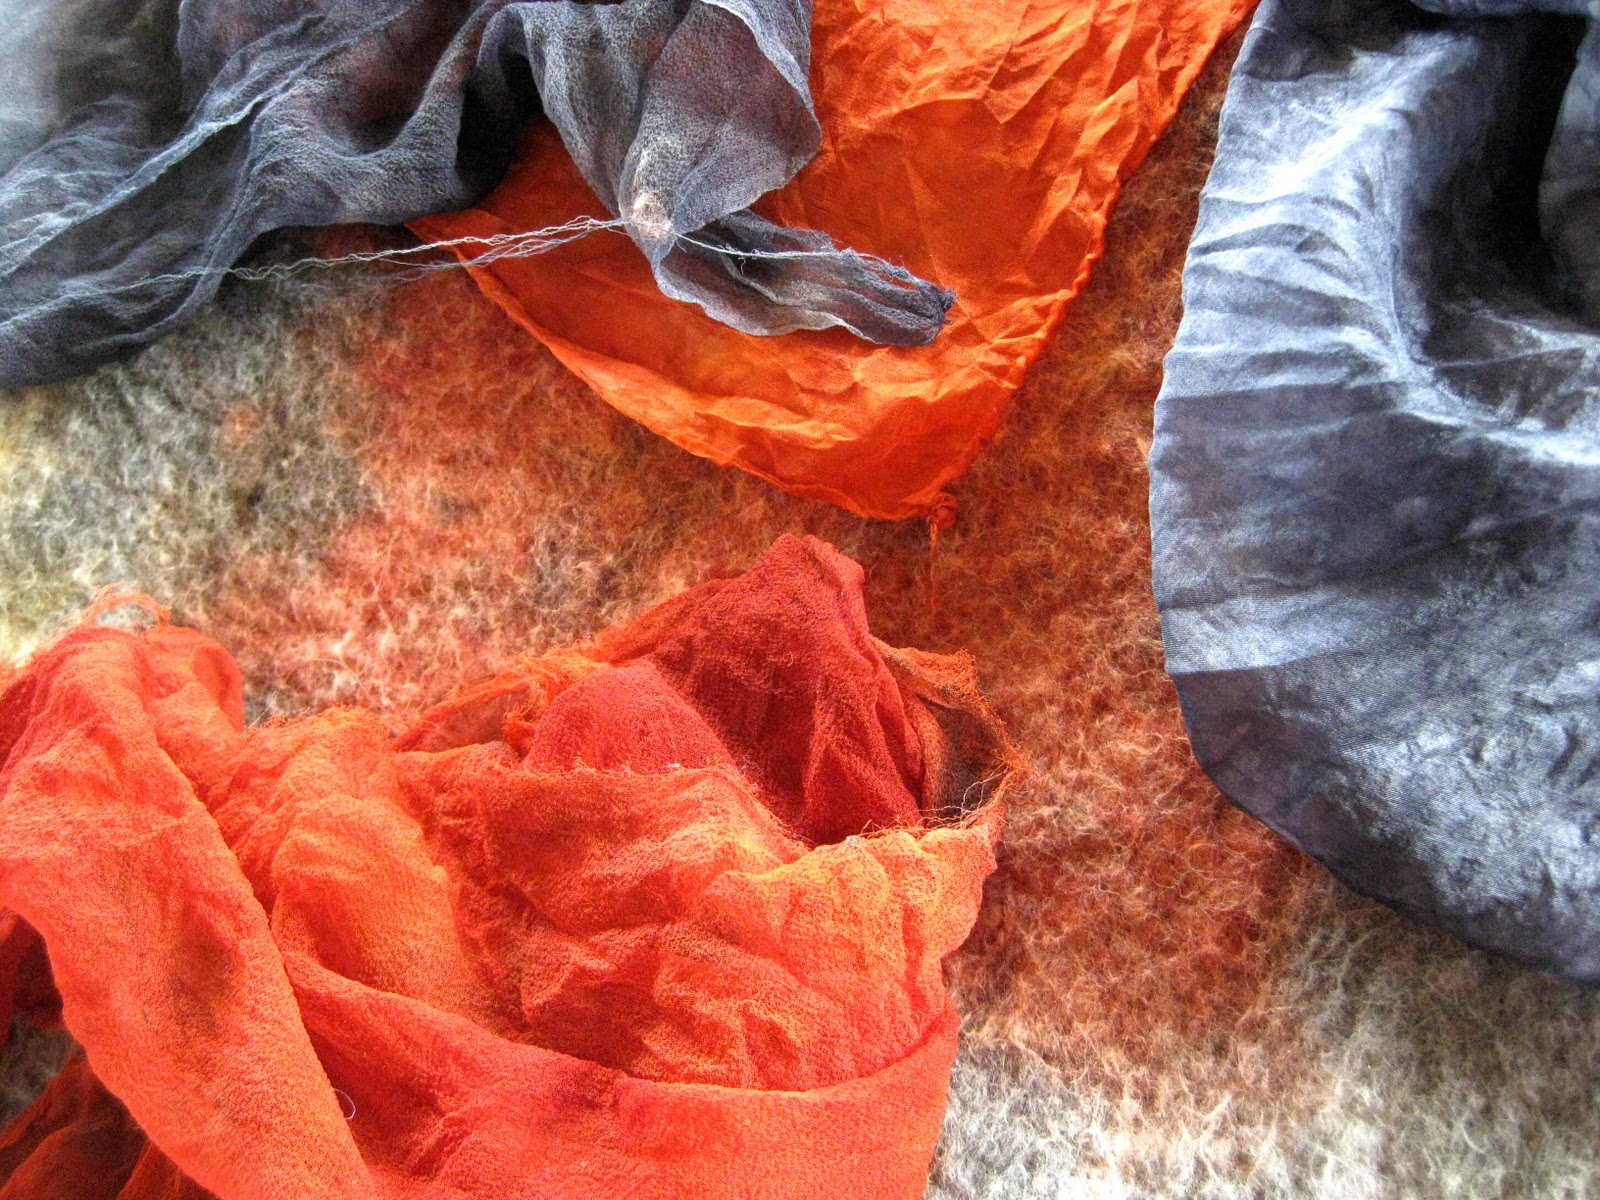
Finally, Carolyn dyed some fabrics for an artwork depicting patterns in rock.


I adore these colours....


...and in glorious close up.


Pin It

Friday, November 25, 2011

Sculptural books with Gail Stiffe

I did a sculptural bookmaking course last weekend taught by book artist Gail Stiffe.  I had a lovely time with my oh so creative friends from Stitching and Beyond for the three day workshop at the Moonah Arts Centre.  Pictured below are some of my efforts from the class.


This book is made using a "W" binding.  The paper on the covers was made by me using a technique learned in the class whereby acrylic paint is squeezed directly from the tube across the top of a piece of paper and then spread across the page using a paint scraper.  The process is repeated with as many colours as you wish to use.  I found 3 colours to be good.  Any more and my work ended up looking like a muddy mess.


Judicious use of silver metallic paint makes the colours on this paper really "sing".

Fortuitously the colour of the painted paper perfectly balanced the coloured card that I had earmarked for this exercise before starting the course.


This is my version of a flag book.  Sadly I glued the different sections incorrectly and so it didn't really work as a flag book.  Nevertheless I think it makes an interesting wall hanging of deconstructed images.  To see the effect it should have had, there is a fine example here.


This is my piano hinge book.  The name is self explanatory.  This is a simple white book made from 210 gsm water colour paper which has enough body to allow the book to stand without benefit of a cover.

An up close internal view of the "hinge".  Just like on the lid of your piano, right?


This was the first book I made in the class.  Here I have used a two needle coptic binding.  The cover boards are covered with a gorgeous indian silk paper.  The pages are 110 gsm paper taken from a ringbound artist's journal and folded to A5 size.


The workshop was titled "sculptural books" and when I first signed on I thought we were going to be making sculptures from books, or at least sculptures in book form.  Of course, after checking out Gail's blog I realised that it was going to be a little different to what I expected.  That was fine with me as I have never before made books and the general techniques really interest me.  On the last day I really wanted to break loose and make something at least a little sculptural and so...........


I created this little book of a book reading a book.


The signatures (that's what you call the bundles of paper that you stitch between the covers) are composed of some of my painted paper with leaves from a telephone book in between.  Somewhere in my little book is my own name and telephone number.  The hands and arms were difficult to make as the paint paper is very stiff.  Hence their rather rudimentary form.  Despite this I think they are playfully expressive, if not perfectly formed!


At the end of the day we all put our work on a table so that we could admire each others work.


Here's a flag book done properly.


The books on the left were made by the uber talented Mahdi Chandler.  A good friend and my bench buddy for the workshop.


Closer view of Mahdi's books.  Mahdi had a wonderful selection of papers to work with which she combined in her own beautiful style.  The book on the right is covered with a Japanese Fabric.


Mahdi's celtic binding looks fabulous with her paint paper cover.


Top view shows the beautiful hand torn signatures.


Ros Grant's lovely "W" bound book with toad skin decal on the cover.


Ros also made this fabulous flag book featuring her own night time photography of coloured lights. Ros glued the photos back to back so that the book has a stunning set of images regardless of which way it is view.  Brilliant.


Don't know Sandra's surname, but for me her piano hinge book was the winner.


Beautiful marbled paper on Jenny's two needle coptic bound book.


Pin It