Showing posts with label natural dyeing. Show all posts

Saturday, March 17, 2012

Indigo Dyeing Weekend.

I've been a bit slow getting up my photos from my weekend away at Jacky's Marsh, largely due to being incapacitated by a severe migraine induced by sitting in the sun, breathing the fumes from the natural dye baths and forgetting to eat and drink during the workshop.  Anyway, the picture below gives you an idea of just how spectacular the views were.


Shelter that can double as an outdoor kitchen with some early removals from the natural dye pots hanging on the line.

Ralf and Mahdi pull the first samples out of the weld pot.  (Weld is an English plant that dyes in yellow shades.  It grows as a weed along many roadsides in Tasmania.  Nice to know that a noxious feral plant has some use at least.)


Mahdi's weld parcel........

and after opening.

Silk dyes very readily when using eucalyptus cordata.

Early samples from the indigo pot

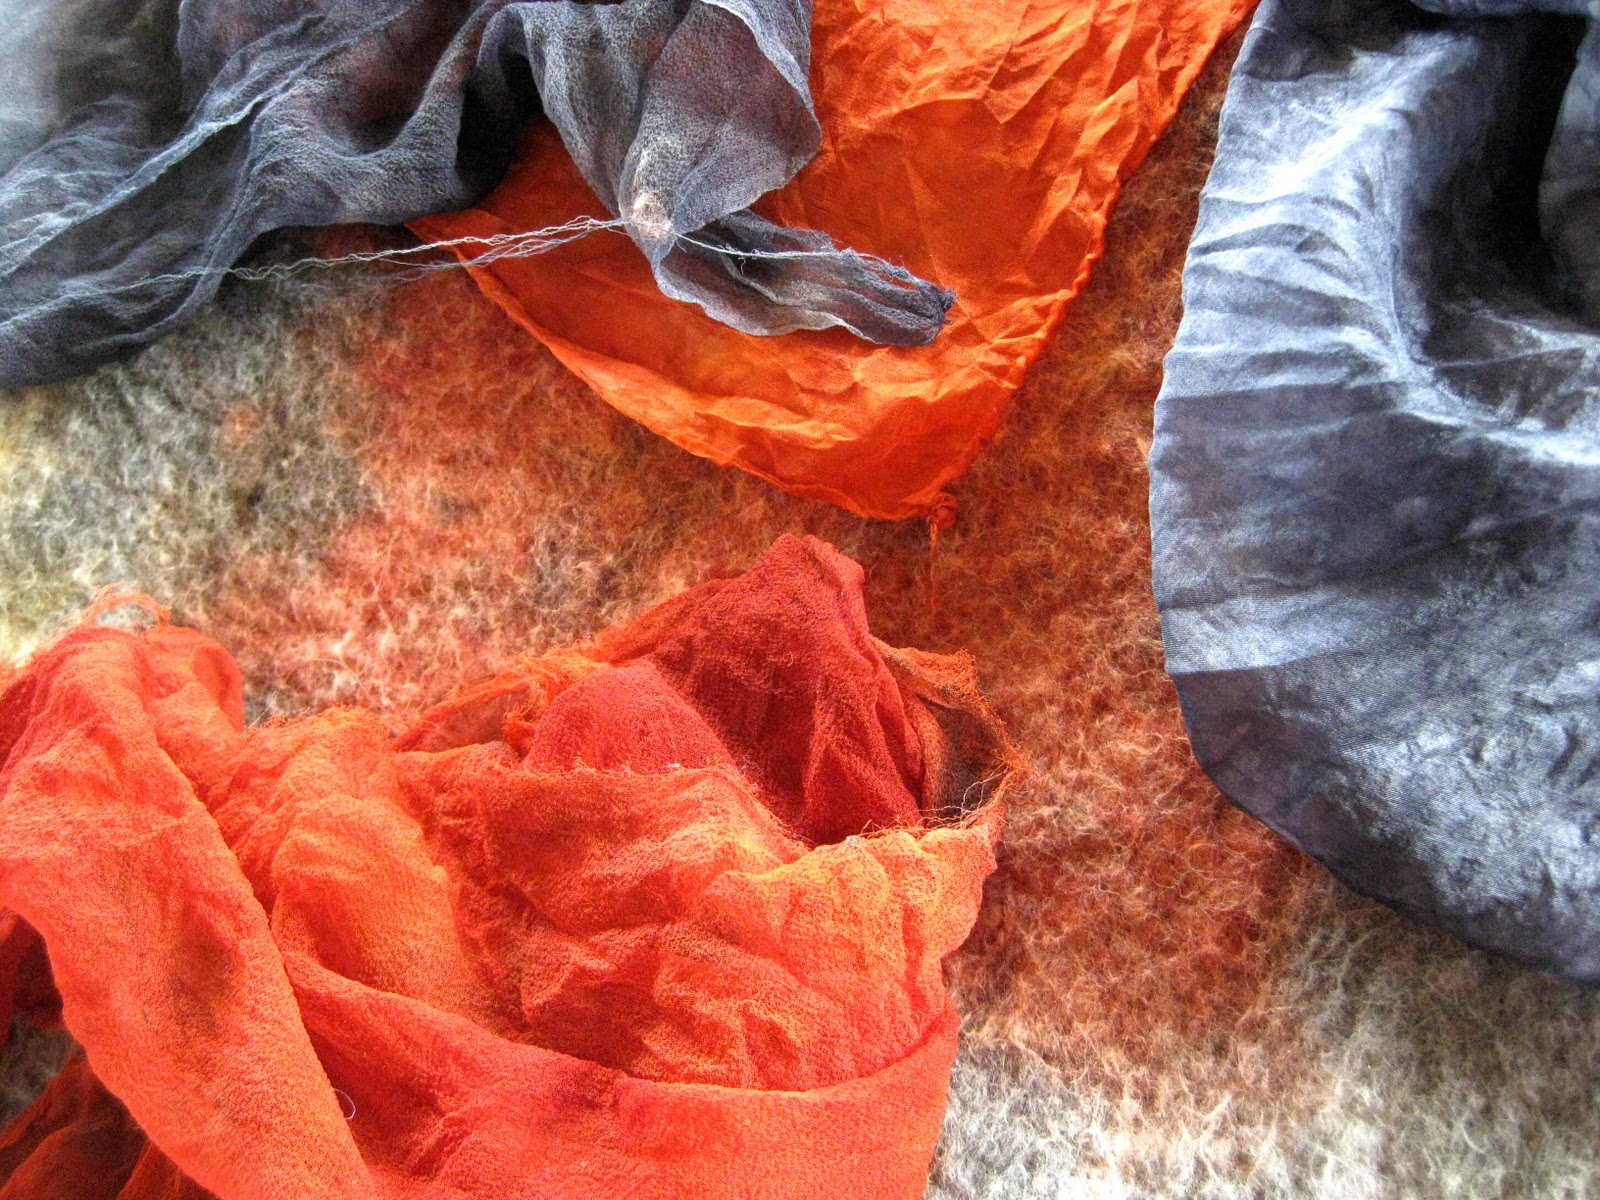
This was the best piece I managed to dye all weekend.  It's a piece of habotai silk that I underdyed using bright orange and pink colours.  I then simply tied the silk at regular intervals (the fabric was scrunched rather than folded before tying).


The close up shots show some of the gorgeous markings.......


and parts where the underdyed colour showed through.  I liked it so much I decided to use it as a curtain for the end of my hallway.  It was a great relief to replace the hideous match stick blind that I have been living with for the last 6 years.

Here's how the curtain looks during the day.  Of course the hallway is much brighter during the day, but I had to adjust the lighting effects to capture how the sun shines through the silk.

Here's how the curtain looks at night.

Before I got that lovely piece of habotai out of the pot everything I had dyed looked revolting.  These homespun cotton samples were underdyed in the weld, cordata and the wattle bark.  Cotton does not take natural dyes very well.  As a result what I pulled out of the vats looked like dirty polishing cloths.  YUK!

After doing some shibori and overdyeing in the indigo I got some ok results.  I'll use these for wrapping presents.

This is a crinkle chiffon scarf that I dyed red and then resisted with rubber bands.

Here's how it looked straight out of the indigo........

and after removing the resist bands and drying.  I was a bit disappointed because I was hoping for solid red circles, although now I realise that to get that effect I would have had to sew them, which would have taken a couple of days work, time I didn't have.


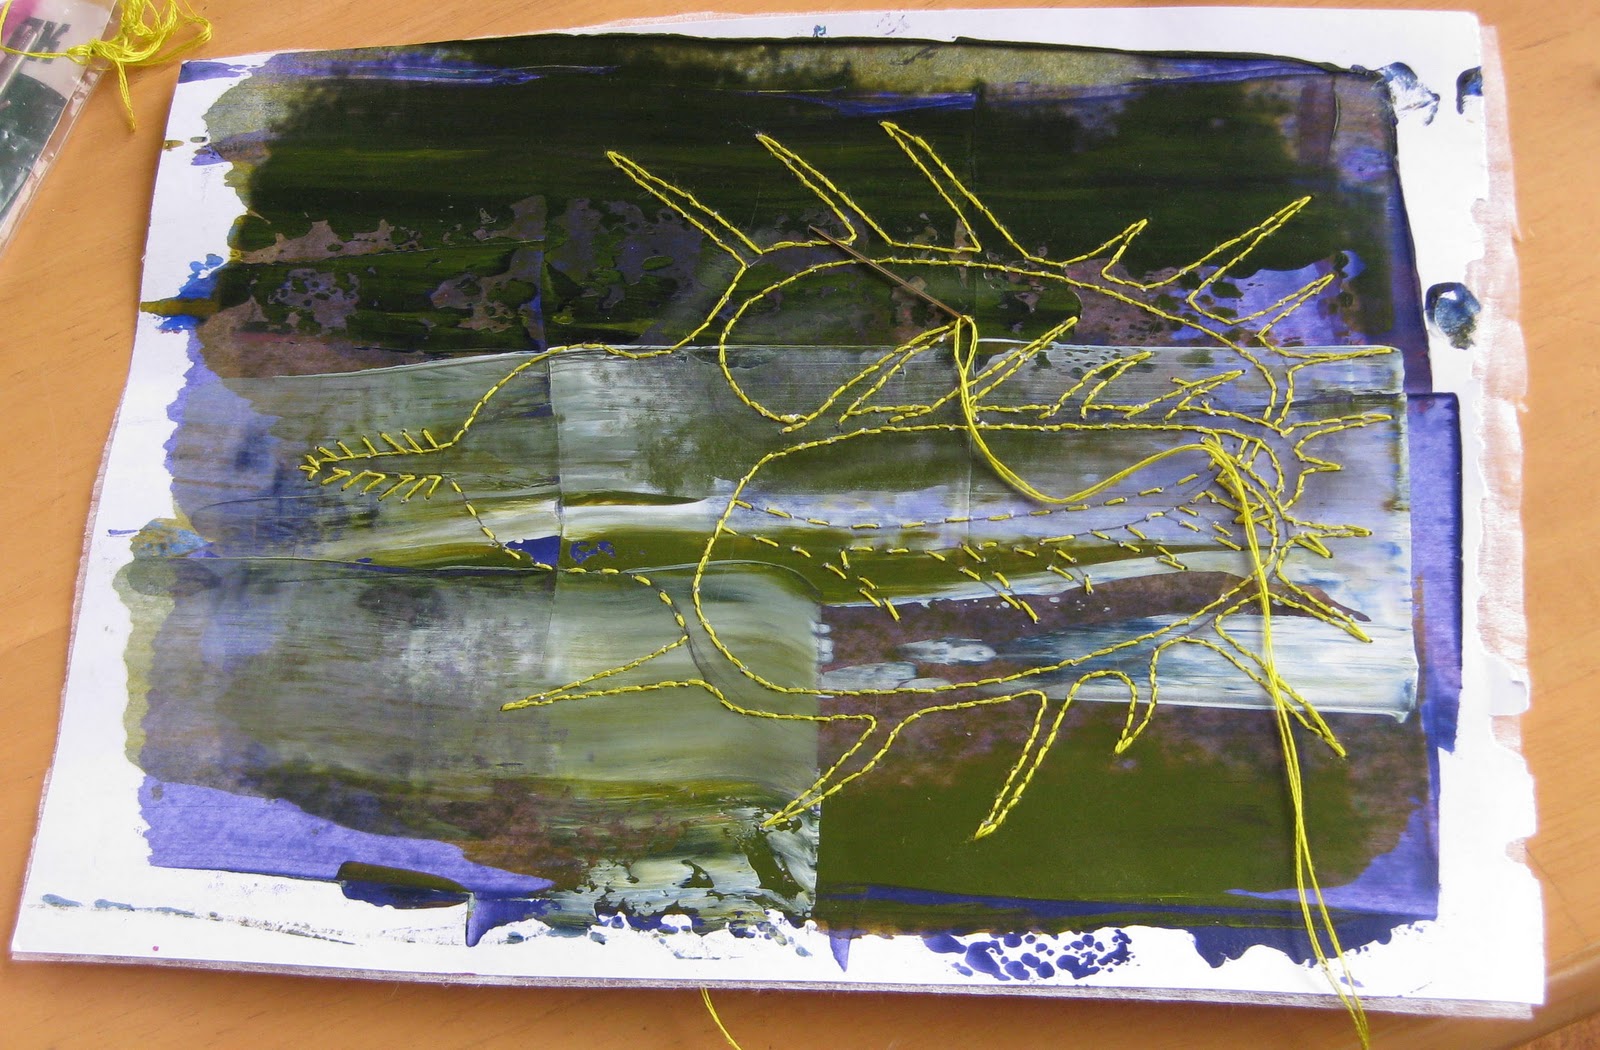
This is the scarf that I showed in a previous post which I spent 6 hours stitching.  Unfortunately the scarf was in the indigo too long and I lost most of the colour of the underdye.  However,  the alternating pattern of folds is as I was hoping.  I intend to not iron it so that the folds remain.  It'll make a great scarf this winter.

Overall a lovely weekend (despite the monster migraine) and I learned heaps, which is, after all the point of it all.


Enhanced by Zemanta
Pin It

Saturday, December 3, 2011

Artists' Retreat at St Helens

I have just returned from a week away at St Helens on Tasmania's north east coast.  Once a year I and my two textile artist friends Carolyn and Jane take a week away so that we can immerse ourselves in all things art and textiles.  We are fortunate to have access to a house at St Helens which is perfect for our activities, including an enclosed patio that makes a wonderful "wet" area.

During my book making workshop the week before I had painted some papers with acrylic paints and so spent my week away working on some embroidered works on paper.


I have been wanting to do some work based on images from Ernst Haeckel's Art Forms in Nature.  Both the works depict the forms of marine protozoa.  It is fitting as much of my work is based on the minute and microscopic, the hidden world without and within.  I thought these would be quick to finish, but they were far more labour intensive than I had anticipated.


I have showed some "work in progress" shots on the second work I created.


Here is the image drawn and traced and clamped to the paper waiting to have holes punched using a book maker's awl.


Light weight fusible interfacing was ironed onto the back of the paper to prevent tearing between the holes which had to be placed quite close together to achieve the curved outlines.  This photo shows the reverse side of the paper with the images punched out in tiny holes.


As you can see it is more difficult to clearly see the punched out image on the front side.


I originally worked the outline in a light blue, only to find, after seven hours of stitching that the completed form was almost impossible to see.


I then went over it in a thicker yellow thread  and that made all the difference.  Fortunately it only took five hours to go over the blue!


The finished work.


I also made some  beaded jewellery while away, but that will be for another blog entry.

Meanwhile, Carolyn and Jane were having an equally productive time.

Jane was experimenting with making lovely gossamer felted scarves.


This scarf was nuno felted onto whisper silk using wool and silk tops.


Tissue silk felted with wool roving.


I loved Jane's felted stole so much I commissioned one for myself.


Fine merino wool felted onto paj silk with silk tops and wool thread added for texture.  This second photo is much closer to the real colour.

Carolyn started off the week with some ecoprinting.


First Carolyn painted the leaves with egg yolk.


The leaves being placed on the T shirt.


After cooking the T shirt in an old iron pot the leaves transferred beautifully with a lovely purple/black border imparted by the iron.


The parts of the T shirt that were on the outside of the bundle received most of the iron colouring.


Equally successful was the printing on a rayon/silk velvet scarf.

After working with the natural dyes Carolyn had a hankering for colour.  

Saris washed and flapping their gorgeous colours on the line.


The pink sari was used as a base for her nuno felted bag.


Not quite finished (the handles are pinned on).  Carolyn ran out of fleece after the first side was felted and so had to dye more fleece.  As a result the bag has two different sides.


Close up of the sari fabric felted onto the handle ends for decoration. 

Finally, Carolyn dyed some fabrics for an artwork depicting patterns in rock.


I adore these colours....


...and in glorious close up.


Pin It